Unit Testing Vue/Vuetify With Jest and Vue-Test-Utils
Intro
To get started, create a directory and init a project inside that directory:
mkdir my-project
cd !$
npm init --yes
Code Example Repository
Here’s the gitlab repository for these examples in case you want to clone or take a look.
package.json
We need a bunch of packages to get things going. I learned what was needed by reading vue-test-utils guide for jest and vue single file components and some more stuff from the jest documentation. Still, I had some errors when trying to run the tests that more more or less guided me to install some more packages. All things put together, I ended up with this package.json file:
file: package.json.
{
  "name": "vuetify-unit-tests-jest-vue-test-utils",
  "version": "0.0.1",
  "description": "",
  "main": "index.js",
  "scripts": {
    "unit": "jest tests/*.spec.js --watchAll"
  },
  "keywords": [],
  "author": "",
  "license": "ISC",
  "dependencies": {
    "vue": "^2.5.13",
    "vuetify": "^1.0.0-beta.5"
  },
  "devDependencies": {
    "@vue/test-utils": "^1.0.0-beta.10",
    "babel-core": "^6.26.0",
    "babel-jest": "^22.1.0",
    "babel-loader": "^7.1.2",
    "babel-polyfill": "^6.26.0",
    "babel-preset-env": "^1.6.1",
    "babel-preset-es2015": "^6.24.1",
    "babel-preset-stage-2": "^6.24.1",
    "babel-preset-stage-3": "^6.24.1",
    "jest": "^22.1.4",
    "jest-vue": "^0.8.2",
    "regenerator-runtime": "^0.11.1",
    "vue-jest": "^2.0.0",
    "vue-loader": "^14.0.2",
    "vue-router": "^3.0.1",
    "vue-template-compiler": "^2.5.13",
    "webpack": "^3.10.0"
  },
  "jest": {
    "moduleFileExtensions": [
      "js",
      "json",
      "vue"
    ],
    "transform": {
      ".*\\.(vue)$": "<rootDir>/node_modules/vue-jest",
      "^.+\\.js$": "<rootDir>/node_modules/babel-jest"
    },
    "mapCoverage": true,
    "setupTestFrameworkScriptFile": "<rootDir>/tests/jest-setup.js"
  }
}
-
First, note the test script to run
jestagainst a set of files in thetestsdirectory. -
Then, see the
"jest"configuration section, which is very important. In the"transform"section we havevue-jestandbabel-jestthat makes surejestcan test stuff from our.vuesingle file component files. -
This will tell
jestto includejest-setup.jsinitialization file for your tests.
After making sure your package.json file has the necessary dependencies and devDependencies and configurations similar to the one shown above, run:
npm install
babelrc
We also need a properly configured .babelrc. This worked fine:
file: .babelrc.
{
  "presets": [
    ["env", { "modules": false }],
    "stage-3"
  ],
  "env": {
    "test": {
      "presets": [
        ["env", { "targets": { "node": "current" }}]
      ]
    }
  }
}
What maters for tests is the "env.test" section. The "presets" section has nothing to do with tests and is used by your module bundler.
jest-setup.js
This file could have any name you like, just make sure it is correctly specified in package.json. For our case, we don’t even need this setup file, but let’s include it as it serves as an example on how to do it and it is ready to use when we happen to need more initial configuration for jest unit tests.
file: tests/jest-setup.js.
//
// package.json has a section that instructs jest to
// read this setup/startup file.
//

import Vue from 'vue';

// DON'T DO THIS or you'll have problems like <v-btn :to="..."> rendering
// as <router-link> instead of <a href="..."> on the unit tests.
// See tests/Foo.spec.js to learn how to use Vuetify in the unit tests.
//import Vuetify from 'vuetify';
//Vue.use(Vuetify); // NO, DON'T DO THIS.

// You may not need this. Uncomment only if you see some sort of
// regeneratorRuntime error.
//import 'babel-polyfill';

// So we don't see unnecessary Vue warnings about production.
Vue.config.productionTip = false;
Foo.vue, the component to unit test
file: src/Foo.vue.
<template>
  <v-container grid-list-md index-of-things >
    <v-layout item-index-row index-row row wrap align-center
      v-for="(item, idx) in items" :key="idx">
      <v-flex xs12 sm6>
        <div>

        </div>
      </v-flex>
      <v-flex xs12 sm6 wrap-btn>
        <v-btn class="btn-edit"
                color="blue"
                tag="section"
                :to="{ name: 'item-edit', params: { item_id: item.id }}">
          Edit
        </v-btn>
      </v-flex>
    </v-layout>
  </v-container>
</template>

<script>
export default {
  data () {
    return {
      // Note that we have two items by default.
      items: [
        { id: 1, name: 'Foo' },
        { id: 2, name: 'Bar' }
      ]
    };
  }
};
</script>
In this component, we are iterating over the items array, and we display them on the UI using some Vuetify components.
tests/Foo.spec.js, the unit test file
Finally, our test file.
file: tests/Foo.spec.js.
import { mount, createLocalVue } from '@vue/test-utils';
import VueRouter from 'vue-router';
import Vuetify from 'vuetify';
import Foo from '../src/Foo.vue';

describe('Foo', function () {
  let wrp;

  const routes = [
    { path: '/items/:item_id/edit', name: 'item-edit' }
  ];

  const router = new VueRouter({ routes });

  beforeEach(() => {

    const localVue = createLocalVue();
    localVue.use(VueRouter);
    localVue.use(Vuetify);

    wrp = mount(Foo, {
      localVue: localVue,
      router,
    });
  });

  // `it' and `expect's ready to go now.
});
Okay, let’s take a look at what we have done here, because this is the part that interest here the most for this post.
-
We import everything we need for this test. Note that Vue itself is not imported.
-
Some routes are necessary. In our component, we are just using the
editroute so we define just that one. -
Create an instance of VueRouter.
-
Before each test, we create a local Vue instance (take a look in vue-test-utils docs why we do this) and make it aware of our routes. Since our component uses
:toand uses our named route, our tests need to provide the router with that route namedroute-editfor things to work. -
We also make our
localVueaware of Vuetify. This is very important. we should not make a global Vue instance aware of Vuetify. That is, we should not doVue.use(Vuetify)(look at the comments intests/jest-setup.js, and also take a look at this question on the vue forums). -
Then we mount the component passing it
localVueandrouter. From this point, we should have no trouble unit-testing our component.
Some Tests
We get to the actual tests. Things should be more or less self-explanatory, and I also added comments to explain certain decisions.
Let me make some more notes here, though.
v-for Does Not Display Items
Vue’s v-for directive does not display the element it is in if there is nothing to iterate over. That is why, the element with the class .item-index-row should not even be in the DOM should we not have any items.
it('does not display element if there are no items', () => {
  // No items to display.
  // NOTE: By default, our component has some items, but we use
  // setData() here to override it with an empty array of tiems to
  // make sure we have not items at all and our test works as
  // expected.
  wrp.setData({ items: [] });
  expect(wrp.find('.item-index-row').exists()).toBe(false);
});
v-for Displays Items
Here v-for has items to iterate over, so, Vue goes ahead and inserts stuff on the DOM.
it('displays element when there are items', () => {
  // Some items to display.
  // NOTE: By default our component has some items, but we use
  // setData() here providing an array with at least one item so
  // we can be sure we have items and therefore our UI _should_
  // indeed display that .item-index-row element.
  wrp.setData({ items: [{ id: 1, name: 'My Item' }] });
  expect(wrp.find('.item-index-row').exists()).toBe(true);

  // And we also expect to see the text 'My Item' in there.
  expect(wrp.find('.item-index-row').html()).toMatch(/My Item/);
});
Display Exactly N Items
If we have three items to display, according to our component, we should have three .item-index-row elements.
it('displays N rows when there are N items', () => {
  wrp.setData({
    items: [
      { id: 1, name: 'Item 1' },
      { id: 2, name: 'Item 2' },
      { id: 3, name: 'Item 3' }
    ]
  });

  // findAll returns an array, and an array has the length property.
  expect(wrp.findAll('.item-index-row').length).toBe(3);
});
Render Vuetify VBtn as Anchor Tag
And our <v-btn> Vuetify component must be rendered as an anchor tag that links to the edit form for the item in question.
it('should render btn as anchor tag with proper edit url', () => {

  // Not using setData() here. Just assume we have some items in
  // the component (our example component does indeed have two
  // default items).  This may or may not be a good approach. It
  // varies from component to component and from project to
  // project. Assess your own situation and decide for yourself.

  let btn = wrp.find('.btn-edit');

  // Each item displayed should have an edit link. Our component
  // uses <v-btn> with the `:to` attribute. That makes it an <a>
  // tag, a link.
  expect(btn.exists()).toBe(true);

  // And it should route to /items/<id>/edit url.
  expect(btn.element.href).toMatch(/items\/\d+\/edit/);
});
Vuetify Components Render as Normal HTML
And we should see that all Vuetify components are rendered as HTML.
it('should have a happy ending', () => {
  // You should see all Vuetify components properly rendered
  // as normal HTML tags. For example, <v-flex> should be
  // rendered as <div class="flex ...">
  expect(wrp.contains('div.flex')).toBe(true);

  // Just so that you can visually inspect the rendered html.
  console.log(wrp.find('.item-index-row').html());
});
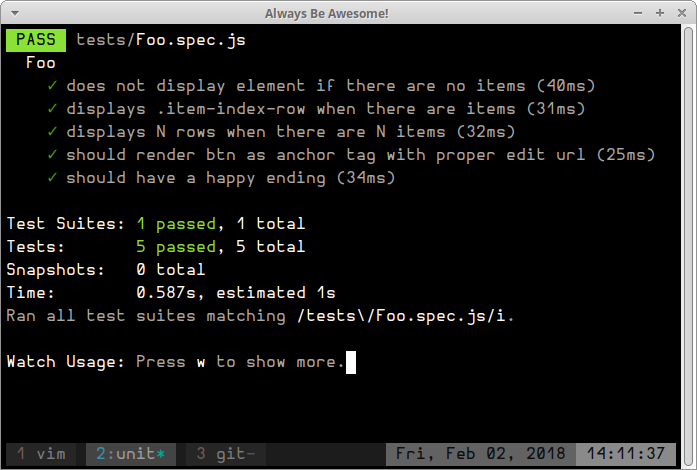
Here’s a screenshot of the tests output for you to enjoy!
What About Webpack‽
You may have noticed we did not even speak about Webpack, or any other module bundler for that matter. That is because jest, with the help of babel-jest handles our javascript code without the need of configuring webpack. We just need a .babelrc with a proper env.test property set (as we did) which is used by the test environment only. Just as a reminder (because we already menioned this), we aslo used jest-vue to transform our Vue SFC (Single File Components) to javascript, which is then handled by babel-jest and then finally handed over to jest.
So, yeah, you will have a module bundler taking care of your code but that is not necessary for the sake of unit tests alone with jest and vue-test-utils.
Feel the force. See the force. Be the force!